👋 I'm curently looking for a new role. Hire me!
Please Note: This post was published in 2008 so the information here is quite out-of-date. I have not used Lulu in a very long time so I cannot, currently, vouch for their quality or service.
I posted a while back with my armchair analysis (no experience) of a few of the many self-publishing outfits available. I liked Lulu the best from my initial look and, as such, went with them to publish my client’s book. Here are my impressions about the whole writing, publishing, and uploading experience.
Why Lulu?
My review post tells a bit more about why I picked this route but, to sum it all up:
- Low cost to get an ISBN and listed on books-in-print
- Great support material
- Seemed simple and straight forward
There is something to be said about a company that just puts it all out there. Between all of their FAQs and their user community, it seemed hard to go wrong with them. The most important, however, was the price. My client didn’t have any intention of building a marketing campaign behind his book besides what he could conjure up himself. Consequently, extra services, add-ons, and packages were simply of no interest. Lulu is bare-bones: you get an ISBN and you get listed everywhere important. That’s all we wanted and, for $100, that’s what we got.
How does it work?
Lulu lists out all the steps in their help section and it really didn’t stray from that (so far).
- Purchase Published by Lulu or Published by You service and receive an ISBN.
“Published by Lulu” ISBN’s are assigned immediately.
“Published by You” ISBN’s take up to 3 business days to be assigned. This is because extra information needs to be processed with the ISBN Agency. - Revise the book to contain the ISBN number in the copyright page and add a bar code to the back cover (for one-piece covers).
- Purchase a proof copy of this newest version of the book.
- After receiving and carefully reviewing the book, either:
a. Approve the book on Lulu. Go to Step 6.
b. Deny the book and make changes. Go to Step 5. - Make revisions and upload this new manuscript. Go back to Step 3.
- The book is uploaded to the distribution center within:
3-5 business days for “Published by Lulu” distribution
2 to 3 weeks for “Published by You” distribution. - Printer reviews the book to ensure it is up to standards. This can take up to 2 weeks.
Once accepted for printing, it can take another 6 to 8 weeks before the book is available through online retailers.
If rejected for not meeting requirements, you will be notified via e-mail that the book must be revised. Go back to Step 2. - The book becomes available for listing with online booksellers.
- Online booksellers like Amazon decide whether or not they would like to list the book. (In our experience, they almost always list it.
Once a month, online booksellers update their databases with new books. When they update (if the booksellers choose to list your book), you will see the book listed as “currently available.” This can take 6-8 weeks.
How did it go?
Step 1: “Purchase Published by Lulu or Published by You service and receive an ISBN.”
Sure enough, walk through the straight-forward form they provide, buy the publishing option (we chose “published by Lulu”), and you’re published. Wait, what?
Here was one of the few minor problems I had with this process. You’re asked for a title and an author right off the bat. Make DAMN sure that this is the title and author you want to use. The ISBN is tied to the title of the book so if you put in a title now and want to change it later, you have to buy a new ISBN. This wasn’t terribly clear and, in the end, we wanted to change the title a bit but couldn’t for fear of messing up the ISBN tie. So, word to the wise, your book content, cover, and description can change over and over but the author and title cannot.
Speaking of which, this information was in the FAQ (it was not terribly clear that the title would be finalized as soon as your get an ISBN). READ THE FAQ. Which FAQ? EVERY FAQ, READ EVERY ONE THAT PERTAINS TO YOU. I probably would have made a million more mistakes if I didn’t read that thing over and over. Pretty much every question you could have is contained in there. Don’t skip over this just because you think you know what you’re doing.
After entering in your author and title, it asks you to pick the size, binding, and color. We chose 6″ x 9″ (an odd size but it worked out in the end), perfect binding, and black and white. It doesn’t seem like it on the site but perfect binding is your typical paperback binding.
Next you need to upload the file. That came fast. This is my second minor gripe with this service. Lulu calls books “projects” which, to me, says “work in progress.” Instead, “project” means the finished product (kinda). Keep in mind, you can make revisions to the cover and text as much as you want before everything is finalized. Still, for the project to be created, you have to have SOMETHING to upload – same goes for the cover. If your book/cover isn’t complete, upload anything and come back and revise the content.
At this point, I was a bit freaked out because everything was not finalized and I was scared that I might not be able to edit. So I read the FAQs and it said that I would be able to make revisions. I’ll talk about the formatting and layout later.
Upload your book file (text, no cover) and Lulu coverts it to a print-ready file. You can take a look at the file or just move on (I never looked at their version of the file, assuming it was the same as the PDF I uploaded [it was]). Next, they ask for your cover to be uploaded, then the pricing and description. At the end you get a submit button which, honestly, was a bit difficult to press. Keep in mind, this submit button locks in your author and title but not your content and cover. Press the button and you get a the fairly exhilarating message, “You’re published!”
The work has only just begun.
Step 2: “Revise the book to contain the ISBN number in the copyright page and add a bar code to the back cover (for one-piece covers).”
We chose the one-piece cover (you design it from scratch as one big piece) so that’s what I’ll talk about.
I did all the design and layout in Photoshop CS3. It worked great for me and that’s what I would use again for the same task. You also need access to Adobe Acrobat to make the PDF file. There are free PDF making programs but Acrobat has all the document control you need (quality, size, etc).
What you need, in the end, is a very high-quality PDF file that conforms to their size requirements. I looked to their Book Covers FAQ for information and found what I needed. Here’s the deal:
- Find your size on the chart from the link above (ours, for reference, was 6×9)
- Use their spine width calculator to find how big your spine is based on the number of pages (you’ll need to know how many pages your final version will be – if you’re one or two off, it won’t make a big difference but if you can, be exact)
- Make your new document in Photoshop or whatever program you are using. Set your resolution to 300 or higher (I used 600 and it looked perfectly clean) and enter in the dimensions (height is listed on the site, width includes the spine. For our 6×9 with 120 pages it was 9.25″ [9″ + bleed, as listed] by 12.52″ [6″ x 2 + 0.27″ spine + bleed]).
- First thing, set guides to indicate the spine (for our 6×9, the vertical guides were set at 6.125″ [back cover + 1/2 bleed] and 6.395″ [spine]).
- Go crazy! Remember that there will be about 0.125″ cut off from every edge. If you have a picture/pattern that goes to the edges, you’re going to lose a bit.
- Now, you’ll need to add a space for the barcode and, if you want, the product number from Lulu (just makes it easy for people to find). Here is the information on how/where to place the barcode and here is where you go to generate the barcode (product code is the ISBN, I did add the auxiliary barcode [value = 90000], I left the color settings the same, I did include the “>,” I left the font as-is and downloaded it from here, and I left the rest the same]. The barcode comes in EPS format (standard vector graphic, readable by Photoshop and Illustrator) and must be placed in the space you left. All of this seems really scary at first but it all comes together if you follow the directions.
- Saving the file was bit difficult. Make sure that the final size is correct and the resolution is what you set in the beginning. I set everything to the highest quality settings (highest quality for JPEG, reduce images to 600 DPI) and in the simplest format possible (do not retain Photoshop editing capabilities, PDF 1.5 format). The final file was 5.3MB, for reference.
The cover was a bit unnerving because I don’t have tons of print experience and this wasn’t my book! Using the information above along with the FAQs, I ended up with exactly what I wanted printed in very high quality.
Step 3: “Purchase a proof copy of this newest version of the book.”
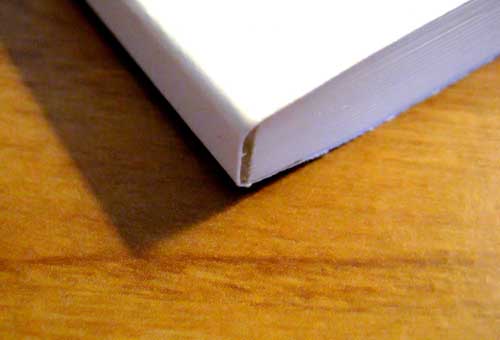
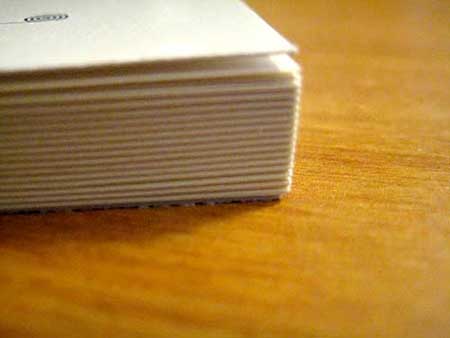
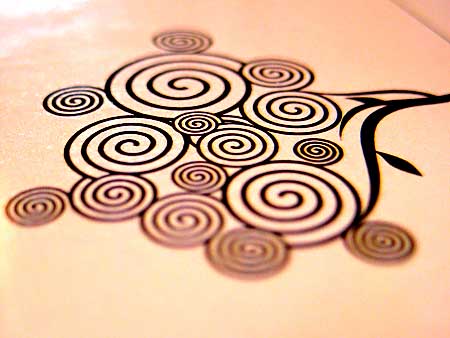
$10.36 for ours, not too bad. I was VERY pleased with the quality:


The cover print quality was immaculate and the inside looked great. The paper is off-white (so is the cover but it has a background color) and super-smooth. The pages are not very thick but nothing about it feels cheap; it’s the real-deal. Black print was perfect but gray, because the printing is true black & white (not monochrome but “black ink or no ink”), is not smooth (see the fourth pic above). The binding is high-quality and exactly what I wanted. I was completely satisfied with the print quality… to be honest, I was taken aback by it. When I gave it to my client, he was speechless for a minute or so (this is his first real, published book).
What I wasn’t pleased about (which is entirely my fault) was the page numbers. Here are a few things to keep in mind when you’re making your content:
- Use their templates. That will eliminate a lot of problems.
- Be careful with your page numbers. If you have a title page and an introduction and other pages before the content, you’re not going to want page numbers on them. I made a total of 6 different Word files: one for the title page, copyright info, and dedication, one for the foreword and intro, one for a second title page I wanted, one for the first half of the book, one for the second, and one for the last couple pages. I compiled them all together in Adobe Acrobat. Page numbers in Word can be difficult to work with so make sure everything looks good when you’re done.
- Remember that you’re laying out the book from the VERY FIRST PAGE after the cover to the VERY LAST PAGE before the back cover. Leave two blank pages in the beginning (one page front and back) and one blank page on the end if you want it to be widely available (distribution services require a certain layout).
- When you read through your final PDF manuscript, pay very close attention to which side the page number shows up on (if you choose the Word option to have them switch sides). The first page in the PDF will be the absolute first page in the book. Look at that page and say out loud “right.” The next page falls on the left so look at that one and say out loud “left.” Do this through the WHOLE MANUSCRIPT, paying attention to how the pages line up and which pages are grouped together. If it isn’t right, insert/delete a page. Make sure your title page is the third page (“right”) and the copyright page is the fourth (“left”).
- I used another published book to lay out my pages and to make sure my copyright page had the right information. This was very helpful.
Step 4: “After receiving and carefully reviewing the book, either: approve the book on Lulu or deny the book and make changes”
We made a total of 3 revisions (putting us on the 4th revision edition) before approving the book. Make sure everything is golden and that you followed all of the distribution rules before you approve the book. Approving the book just consists of pressing a button and reading another satisfying message:

Anything else to know?
I just approved the book before writing this article so there might be more to say about the publishing process. All-in-all, I’m very pleased with how this came out and I look forward to doing business with them in the future.
If you’re thinking about publishing on your own, as long as you’re somewhat computer/graphics savvy, I would recommend Lulu.
< Take Action >
Comment via:
Subscribe via:
< Read More >
Tags
Newer

Jul 18, 2008
New new business card design: the process + feedback
I also need a business card and have not been giving this important piece of a business that relies on word-of-mouth enough attention.
Older
Jul 11, 2008
Is your wifi disconnecting frequently? Here's the fix...
Stop your wifi from disconnecting frequently in Windows XP.